 The original 1975 Corvette had urethane bumpers and a small black plastic air dam/spoiler. Back in 1985, when my uncle was rebuilding the car, he replaced the urethane bumpers with fiberglass ones from Ecklers. The fiberglass has a much better look when they fit properly because the urethane appears wavy.
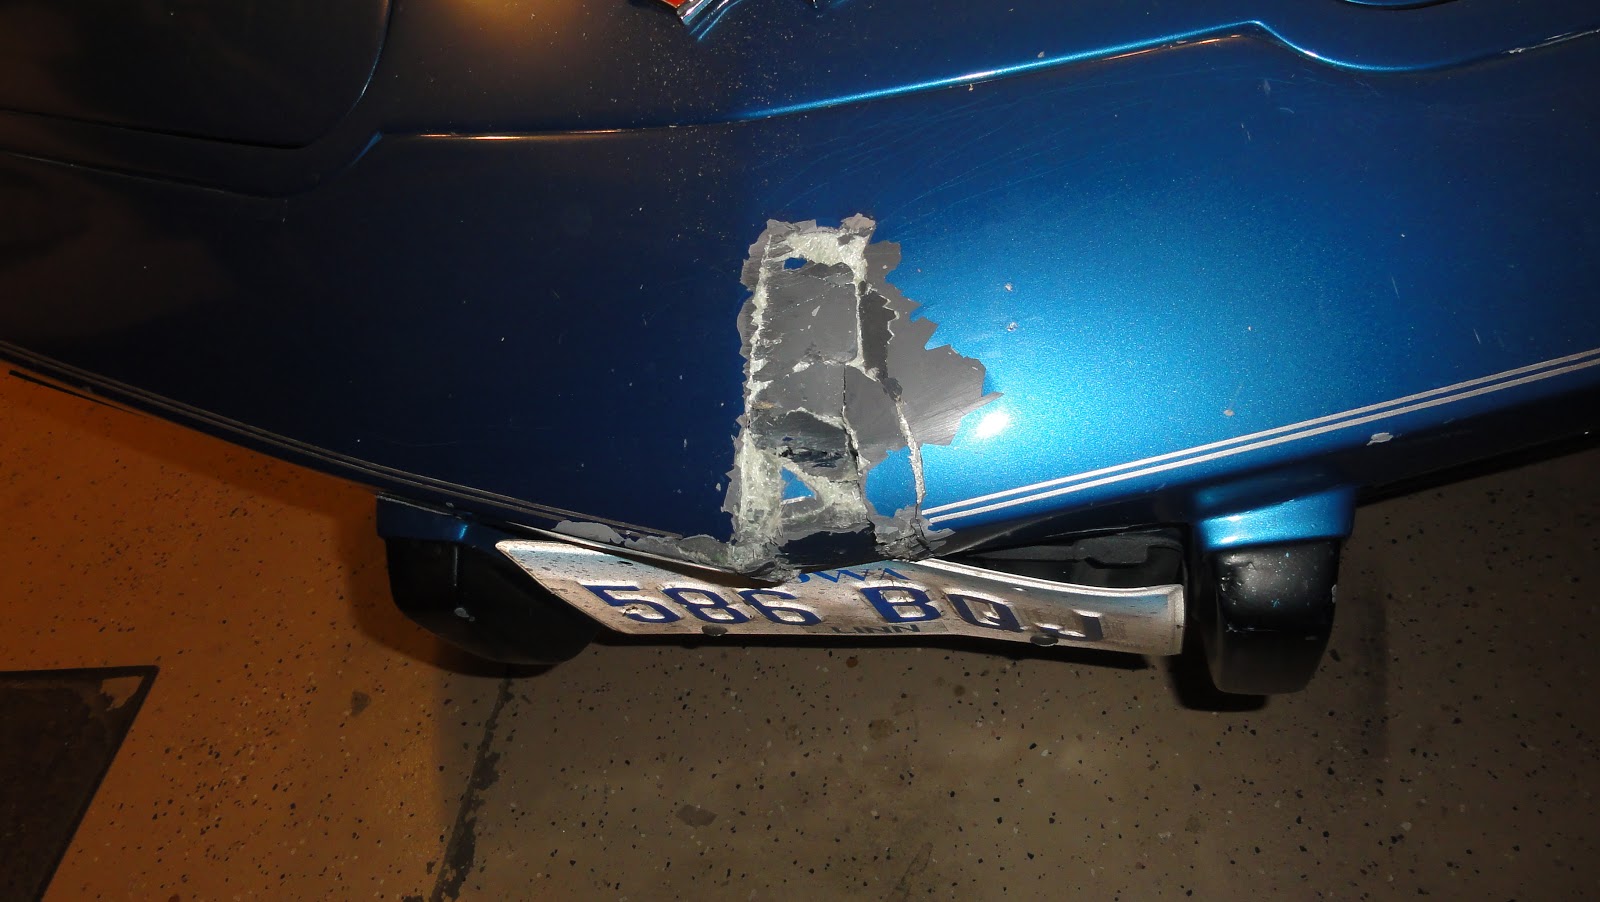
A couple days after I first got the car to my house, I had the car parked in the driveway. All of a sudden, I heard rain starting outside. Since the top and weather seals were completely bad, I ran outside and started pulling the car into the garage. Unfortunately the car would not stop. The car kept going right into the cabinets in the back of my garage. It was moving at a snails pace so all that was damaged was the front bumper and the cabinets.
After insurance inspected the damage, I began removing damaged parts and discovered many old damages not caused by my small crash.

Replacement Parts
- Eckler's Flex-Fit Fiberglass Bumper
- Eckler's Fiberglass Installation Hardware
- Fiberglass Valance
- Corvette America E-Zee Fit Super Spoiler (Part # 41059)
- Black bolts with built-on washers (didn't use the Eckler's kit, just went to the hardware store)
Recommendations
I would highly recommend getting the flexible fiberglass any time you're replacing pieces. So much of these cars was hand made, things tend to be a little off. If your car is really off, the flex isn't going to help, and you should probably consider a urethane replacement. The urethane is even more forgiving than the flexible fiberglass (one of the reasons Chevy used it).

- Offered a flexible fiberglass version. I really wanted the three piece urethane pace car spoiler, because it offers the best flex and forgiveness. It's also the least likely to be damaged. Most of the other fiberglass spoilers are not flexible, so they're very unforgiving.
- Outside corners are not quite as square as the pace car spoiler. The one thing I didn't like about the pace car spoiler was the squareness it creates with the front of the car. The Super Spoiler seemed to be the same size but blended more with the original lines of the car.
- Larger than stock spoiler. The original spoiler is considerably less costly than any after-market one.
- Did not require the original spoiler. Eckler's does offer a spoiler that is almost identical to the Super Spoiler. The difference is that the Eckler's version requires that you have the original spoiler cut and install to properly channel air. Since my air dam was completely ripped out of the bolt holes, it wasn't going to work unless I wanted to find another.
Procedure
- Jack up the car. Probably best to jack up the front and back so it's level, but it shouldn't really matter.
- Removing the air dam/front spoiler. There are a number of small black bolts holding the air dam to the valance and side fiberglass.
- Remove the valance. The valance is attached to the fiberglass sides and the front bumper. Once again, there's a few black bolts holding it place.
- Remove bumper. There are screws that line the entire edge of the bumper. The best way to get at them is to remove the front grilles (just involves a couple black screws and removing the light bulb) and from where the valance used to be.
- Install the new bumper with the installation kit.
- Install the new valance with some new bolts
- Install the front air dam/spoiler.
- This is done by aligning the spoiler to the car by holding it in place.
- Have a second person use clamps to keep the spoiler in place.
- Use a marker to mark the holes on the spoiler (they aren't drilled).
- Drill holes in the spoiler so the bolts just fit. Be very careful when doing this because you want the seems to line up correctly.
- Loosely bolt on the spoiler.
- Use 3M exterior trim tape to keep the outside points of the spoiler in place.
- Tighten down the bolts.

Finished (Without Paint)
Waiting to get the paint done all at one time... Had to get the brackets for holding the front grilles in place. For some reason, those were completely gone. Got some used ones that I was able to clean up for about $50 (which is a good deal if you look at their price in catalogs).
Well, I hadn't thought about it, but when you upgrade to the aftermarket bumper, the grille brackets don't have anything to screw to. Maybe it's just cause I don't have the original honeycomb inside the bumper, I'm not sure. I'm still going to use the brackets I cleaned up though. Will be securing them together with some aluminum stock that I got at the hardware store so the grilles have a bit more support.


it is the line Antifreeze coolant from where i can be here for it to the mid of it
ReplyDelete