Well I know I said there'd be more posts now that I'm done with school but between the kid and getting the final pieces of the car done there hasn't been much time. However, the car is finally driving! It's pretty nice... Torque spews from the engine and reminds me I need new tires. I'll post pictures and what I've learned during these past few weeks of fixing things.
Monday, August 12, 2013
Wednesday, June 19, 2013
Another Brake Fiasco
As I mentioned in a previous post, I'm done with school! I've actually already gotten my degree in the mail, and I've been working hard on the car. Now it's a race to see if I can get it moving before the first kid gets here. I've been taking care of other things. Like painting the nursery, setting up a crib, getting the garden in order, and celebrating the 800 June birthdays... Why are there so many birthdays in June?
Well... back to the car.
I was able to get the rebuilt trailing arms on the car. It was fun doing that by myself without a stand. I used some wire to get the thing in place while I but the bolt in. Kept having issues with the Energy Suspension bushing wanting to come apart, but it finally went together.


Once the trailing arms were on, I was able to finish up the parking brake that I actually bought in 2011! And that's when I started putting on the new Shark Bite rear coil over conversion. This is a very interesting system that eliminates the leaf/mono spring. Essentially, there's a series of metal brackets that you attach to the trailing arm, differential, and rear cross member. A strut bar connects the differential to the bracket that attaches over the rear cross member's bushing. This bracket also serves to re-enforce that cross member. VBP and Van Steel sell a billet piece that does this as well (I ordered it before I realized that the Shark Bite did it for you...).
I did discover an issue with the Shark Bite system. Anything with threads tapped in it would not allow the bolt to go in straight. As a result, two bolts and one of the support struts got ruined and I had to order replacements. The reason the threads were bad was because they were powder coated after the threads were tapped. To fix it, all I had to do was pass some rethreading taps through the holes. After that, the suspension went on quickly and easily.


After putting the new sway bar on, I did the Smart Strut system and then put the parking brake cables in. With the parking brake back together, I could put the brakes back together. While doing that I coated the pads in anti-squeak compound. Everything went back together smoothly on the rear brakes. Since I did the coating on the rears, I decided to do the fronts as well.


When I went to put the front pads back in, I was surprised by brake fluid squirting out of the new powder coated calipers. Ok, they're just under 2 years old, not brand new... But they have less than 100 miles on them! I contacted VBP (the company that rebuilt them and sold me the kit), and they told me that their brakes have a one year warranty. At first they said I was going to have to pay $46 per caliper to rebuild them, but after some talking they agreed to rebuild them if I just paid for shipping. Still a crock, but it's better than nothing. Shipping was freaking $50 though!
Anyway, rather than rely on updated 70's brake technology (stainless pistons with o-ring seals is the updated part) that seems to fail quickly, I decided to get different calipers. Even with these calipers rebuilt by VBP, how can I trust them? They couldn't be rebuilt correctly the first time. Anyway, after much hemming and hawing, I decided to abandon the original style brakes for Wilwood aluminum bolt-on calipers. Yes, it's a lot of money for the upgrade, but they give much more confidence in the brakes. I'll have to sell these powder coated ones so they're not a complete loss...
Wilwood brakes have a lot of benefits as it turns out. They're aluminum so they're not only lighter (about half the originals weight), but they better at cooling the brake fluid. Since they're aluminum you also don't have to worry about pitting and rust. The front calipers are 6 piston instead of 4 so the pressure is applied to the rotors more evenly. The biggest benefit though is the piston itself. It's no longer the loose two piece with a leaky seal. In these they look more like little cups, which means the seals shouldn't go bad like the originals!


While I was waiting for the new calipers to show up, I decided to have the rotors checked out. Unfortunately, the rotors were too run down to turn. So I had to replace them. I'm waiting to receive new premium Centric high carbon rotors from Rock Auto. I decided to go for premium flat rotors instead of the slotted and drilled because they not only last longer, but the pads will last longer as well.
It turns out the rotors were the originals. Pretty good for rotors to last 35 years, but that means I had to drill the rivets from the front spindles. Once I got the spindles free and cleaned up, I decided to replace the bearings even though they still looked pretty good. Replacing the outer races for the bearings was quite a pain. The spindles are now completely back together and I'm waiting on the rotors to get the brakes back together.


Also started back on the interior. I was able to get the tachometer and speedometer back into the car and get the A/C duct work together. This is the third time I've had contact Vintage Air about things that just don't fit in their "Sure Fit" system. Their response was basically just that some models things don't fit and they haven't gotten one in their tech department yet. I think they designed it on a single model... This time I had to modify the duct work. I did it after instruction from Vintage Air. I was NOT going to modify the car structure for duct work... After wrestling with the duct work, I finally got it done. It blow my mind that the they couldn't even get their own duct work to fit. Some ports were WAY too tight, while other were way too loose. I just don't understand...


My brand new Retrosound Zuma radio had sticking buttons, but after a quick call to them, they sent me a new face. It was a very simple swap and all was good. However, it did take me about 3 hours to get the radio attached and properly adjusted. It does look very good though.
Sunday, May 5, 2013
Trailing Arms and Driveshafts
Like I mentioned in my last post, I had to get my rear bearing cores back to VTech Corvette in 30 days and was having fun with driveshafts and u-joints. The dented halfshaft I'd taken to get checked out got balanced, but then after finding out that one of the flanges was welded on crooked, had the tube replaced. After finding out about how out of balance the halfshaft was, I took all my driveshafts/halfshafts down to get balanced.
I picked the shafts up earlier this week. Anyone working on their halfshafts I would HIGHLY recommend getting them balanced. Even after the new tube was put on, the halfshaft had to be balanced because at least one of the flanges was not cast very well. So both my halfshafts have balance weights welded on them now. The driveshaft turned out to be balanced.


Unfortunately, once I got these home and repainted, I had some issues getting the u-joints on the flange yokes. The first one went on fine, but I had some issues with the second. It turned out that the flange yoke got slightly bent when I took the old u-joint out. Because of this, when I was pressing the new u-joint caps into the flange, they didn't go in very well. The flange ended up bending more, and the u-joint got wrecked. This meant another trip down to the drivetrain shop to have them take the u-joint out and replace the flange yoke. Luckily they had a couple of the flange yokes in stock, so it only took a day (few minutes of labor) to get the halfshaft fixed.

With my driveshaft and halfshafts ready to go, I was finally able to finish putting the differential back on. A while back my dad had helped me start the install and we quit because we realized the driveshaft probably has to be installed first. It turns out we were wrong. You can install the driveshaft after the differential is installed, but I put it in anyway. So here's the general procedure... Put my new transmission yoke into the transmission (some fluid came out), put my driveshaft up, and then finished screwing in the differential bolts on the cross member. I'd recommend putting the bolt and bushing for the front differential mount in before putting the driveshaft and differential up. Also, don't install the front bracket on the differential because it will make putting on the u-joint straps a huge pain. With all that up, I proceeded to put the new straps and bolts onto the transmission yoke and differential. For the differential, the easier way to get at the bolts was with a really long extension with a pivot on the socket. This allowed me to put the wrench in front of the cross member.


Now if you look at the pictures of the driveshaft and yoke, you'll notice that the yoke sticks out of the transmission a little over 1.5". The instructions from BTO says it should be 3/4", but searching forums it seems that this is the normal length people experience. A forum I found was actually the EXACT swap I did and it was very reassuring that this is fine.
Getting back to the trailing arms...
Well, I think I mentioned that I had messed up the outer metal shell on one of the trail arm's bushings. Last weekend I was able to get the trailing arms back together with the exception of the one's new bushing. It took some discussions with Vansteel after I got the wrong part, but they were supposed to be sending me the right part earlier this week. It hasn't shown up yet, so I wasn't able to get the one completed and reinstalled this weekend. Actually I installed neither of them...
Getting the new stainless steel parking brakes installed was a serious pain... It took a couple hours to get it right. After talking with Vansteel again, I found out why I had some issues. The activation lever is supposed to be installed on the rear bearings when they get pressed and VTech hadn't done that. In order to get the levers installed, I had to take them apart. The challenge was that there's no good pictures of the lever installed and I ended up putting the lever back together upside-down (one actually came upside down...) the first time. Then I accidentally put one in the shield reversed and didn't realize it until the brake shoes were installed. It did get done, but that's all I did on the car that day...


Now I'm just waiting for that metal shell and the new strut rods to finish up the rear suspension. VB&P actually got the HD smart struts in stock this week and they'll finally be at my door on Monday. It took a quite a bit longer than they had said when I ordered them... Anyway, this is my last week of school ever, weather is getting warmer, and my over time at work is done. That means more time for the car! My wife is thrilled.... No, seriously she wants it done.
Tuesday, April 16, 2013
Pictures of Suspension State
Started the front suspension by installing the Shark Bite aluminum upper control arms. This required that I remove the A/C Compressor from the bracket as well as the alternator and power steering pump. Unfortunately, I had to remove the fans from my radiator as well. Fortunately, all those things can go on and off quickly now and without fully disconnecting them. Next I installed the spreader bar which is supposed to help maintain the frame's geometry.


Next I put on the new tubular lower control arms (disappointed that I couldn't get the aluminum ones...) and Shark Bite coil-over conversion using QA1 single adjustable shocks. Removing the original control arms was nerve racking because of the spring, so I made a safety tool to help from 5/8" threaded steel rods. Getting the shock into the lower control arm was fairly tricky because of the control arm's design. The last piece of the front suspension was the sway bar. Not much to installing that. The sway bar looks upside down, but the spring height hasn't been adjusted yet.


Rather than finish up other things I've started (like the interior and gas pedal), I started working on the rear suspension. First, I decided to get the bearings rebuilt, which led me to rebuild the trailing arms. After doing some reading I decided to stick with standard trailing arms instead of getting offset ones since I probably will upgrade to 17" or 18" rims at some point. Got rear bearing assemblies from Vtech Corvette and am now in the process of removing the old ones so I can do the core return.
The passenger side trailing arm was so rusted on that I had to cut the pivot bolt with a Sawsall to get it out. I also had to go buy a good electric torque wrench to get most of the bolts out (not air because my compressor isn't large enough). When I was putting the differential on and removing the trailing arm, I noticed that the strut bars were bent on both sides and the Shark Bite suspension kits do not include them. After a bit of research, I decided to go with the HD smart struts from VB&P instead of standard strut bars. Why not fix all the car's weak points/geometry issues, right? Anyway, those are backordered but I'm also waiting on new trailing arm shims and pivot bolts. During that time I'm still working on getting the rear bearing assemblies swapped out...


While taking the u-joint out of the halfshaft, I ended up denting it. I now need to take it to a shop to make sure it's balanced enough so it won't vibrate. If it's not good, I'll probably have to just buy a new one for $130 (I was extremely unhappy when I noticed I did that...). With all the parts of the trailing arm apart, I cleaned them up with degreaser and stainless steel brushes before coating them in rust reformer and then brake caliper paint. Brake caliper paint takes several days to fully cure, but it ends up very hard and resistant to pretty much everything. Vtech does an epoxy paint when you get a trailing arm rebuilt by them, which I imagine is very close to the same thing.
I have 30 days to get my bearing assemblies back to Vtech, so expect more posts soon! On a side note, the new black top is sitting on my dining room table... I'm sure my wife is not thrilled I'm leaving it there.
Sunday, March 24, 2013
Still struggling for time...
I know I haven't posted regularly this year, but it's been busy with work and school. Luckily this is my last semester (less than 2 months to go) and my projects at work are finally wrapping up! I'm getting excited to have actual free time again. Free time previously has been me neglecting doing something so I don't lose my mind. I actually got to snowboard this year! Snow has been awesome this winter.
Anyway, I've only gotten to do a little bit on the car since my last post. Previously I had started installing the front suspension and I had started the car for a few minutes only to have a very loud noise come from the power steering pump.
Well, after talking with Speed Direct, March Performance, Tuff Stuff, and Hydratech, the conclusion was that the power steering hoses were not fully bleed and there was a leak somewhere in the lines. Sure enough after letting it sit, I found a leak at the feed line from the reservoir. That being said, Tuff Stuff wanted me to get the pump replaced anyway because of the loud noise (March has a no hassle return policy with Tuff Stuff). All the other service reps said that there shouldn't be anything wrong with the components and that I should just flush and fix the leak.
Hydratech's service rep was very helpful. He said that I needed to check the pump because they're notorious for having too high of a flow rate. When I got my new pump I checked it for a 1/8" port (a 9/64" port was the max I could use safely), which it had. The other thing they said to do was to use a power steering additive to help the bleeding and performance of the system. Speed Direct said that would be fine with their rack and pinion system. So I now have the system all fixed up... I spent a good 30-45 minutes making sure the system was bled.
That's where the engine sits today... I haven't started it since I got the power steering system fixed up. I bought a new Lokar billet gas pedal that I'd like to get installed before starting it again. There's also too much oil in the engine currently. We had a hard time reading the dipstick with the new oil, but after it's sat for a while it looks like I'm about a quart over full.
Besides engine things, I've been working on my Shark Bite front suspension. I have successfully installed the upper aluminum control arms, spreader bar, lower tubular control arms, single adjustable coil over shocks, and a new sway bar. The only thing left to do there is to adjust the spring height and shock rate. Before I start the rear suspension I decided I'm going to have the rear bearing assemblies rebuilt (something I don't believe I'm able to do at this point because of tools and time).
I'll post pictures soon....
Sunday, February 3, 2013
It Starts! And it's loud....
I've been really busy trying to get the car done, so I haven't had time to make new posts in a while. Anyway, since my last post I've done a lot! I finished installing the Steeroids, Hydroboost, and power steering system. I got the exhaust installed which was a real treat because of the Steeroids system and other clearance issues. The one of the header tubes had to be dented... A LOT! I also even started installing the suspension. I've got the new aluminum upper control arms in, as well as the spreader bar. I've got the lower control arm, shock, and spring off the passenger side. Was waiting to see if I had a fuel pump leak before installing the new pieces.


Anyway, last weekend we tried starting the engine. Which we successfully did. Unfortunately, when the engine was dyno'd they used the oil pressure oil on the top corner of the block and didn't plug it when they were done. So we ended up spewing oil all over the firewall and floor. However, getting all the fluids in showed me where I hadn't done the fittings good enough. The heater core fitting on the water pump had to be redone, the check value on the carb fuel line feed needing sealing, and the connections to the fuel pump were leaking.
Fixing the fuel pump fittings was a pain. To get to them I had to take the lower control arm off. Even then it was difficult. I ended up chewing up the threads on the fittings trying to get it back together that I ended up having to replace the whole thing. This time I made the hose portion longer so it was MUCH easier to install. Not sure why I didn't do that in the first place. Another fun thing was the temperature sensor. Apparently aftermarket heads all have 3/8" NPT fittings, but all GM heads before'79 use 1/2" NPT fittings and there are no 3/8" NPT temperature sensors that work accurately with the stock gauge. There's one that's close (WTB-510 for like a Volvo), but I already bought new sensor and couldn't take it back. I had the thing milled down to a 3/8" NPT. Fits perfectly now, but it definitely would have been cheaper to get the sensor that was "close". Oh well, it'll be accurate now.
And now for the videos...
This video is right as I successfully get the engine started without having to immediately turn it off because oil is shooting out.
This next video is right after the previous one. Don't worry about the smoke... The new exhaust wraps are getting broken/burned in (the instructions said that's normal). There is a considerable amount of smoke coming from the exhaust though. At the end of the video you'll hear a really high pitched noise coming from the power steering. I contacted the companies to find out what could have gone wrong, but the fluid is now a green/brown color and is milky instead of clear.
Friday, January 4, 2013
Rack and Pinion System & Brake Booster in the Car
Quick note... I fixed up the post from 11/24 with better organization and pictures. I did that post from my tablet and the interface to Blogger isn't very good.
As I mentioned in my previous post, I've had about a week and a half to work on the car without work and school interfering (just had to do family holiday things). And now with a baby on the way, pressure is on to get this project done! (due July 9th)
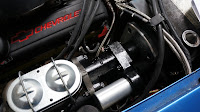
First thing I did was get the wiring done, and it looks pretty good if I don't say so myself! I replaced a fuse box I had gotten with terminal panel because I needed just terminals to hook up to power on ignition, and the connectors for the box allowed it to touch the insulation which I didn't like. I coated the terminal panel with liquid electrical tape (did that to the stud in the engine compartment next to the upper relay as well) just to make sure a positive terminal wasn't exposed. The breaker on the right in the first picture is for the Vintage Air system, the two larger relays are for the electric fans, the smallest relay and the breaker on the left is for the water pump. The upper relay is for power on ignition. Rather than run directly off the ignition circuit, I put a relay in that's triggered by the ignition circuit.


With the wiring complete, I went on to more ambitious tasks... The Steeroids rack-and-pinion and the Hydroboost brake booster. I attempted to get the brake booster a few month ago and install it over a 4 day weekend, but they ended up not being able to ship it out fast enough. For those not familiar with it, the purpose of the hydroboost system is to replace a standard vacuum brake booster with one that runs off the power steering pump. There are several benefits to running such a system, but the main one for me is that I do not have to use the vacuum port on the intake manifold. If you're familiar with some of my previous issues, you know that my new air gap intake, Holley style carb, and stock hood make it impossible for me to use the port without using an absolutely tiny air filter (not what I want to do...).
To be honest the hydroboost went on really smooth. I had a slight issue that I had to drill out two of the mounting holes a little, but other than that, it was pretty easy. The booster has 4 bolts that are horrible to get to with all the wiring in place that I had just done, but with a really long ratchet extension and a swivel I was able to them off and back on with minimal swearing. I haven't hooked up the hoses yet because the Steeroids system will be hooked up as well. Oh, and check it out... I can actually get to the oil dipstick now!!


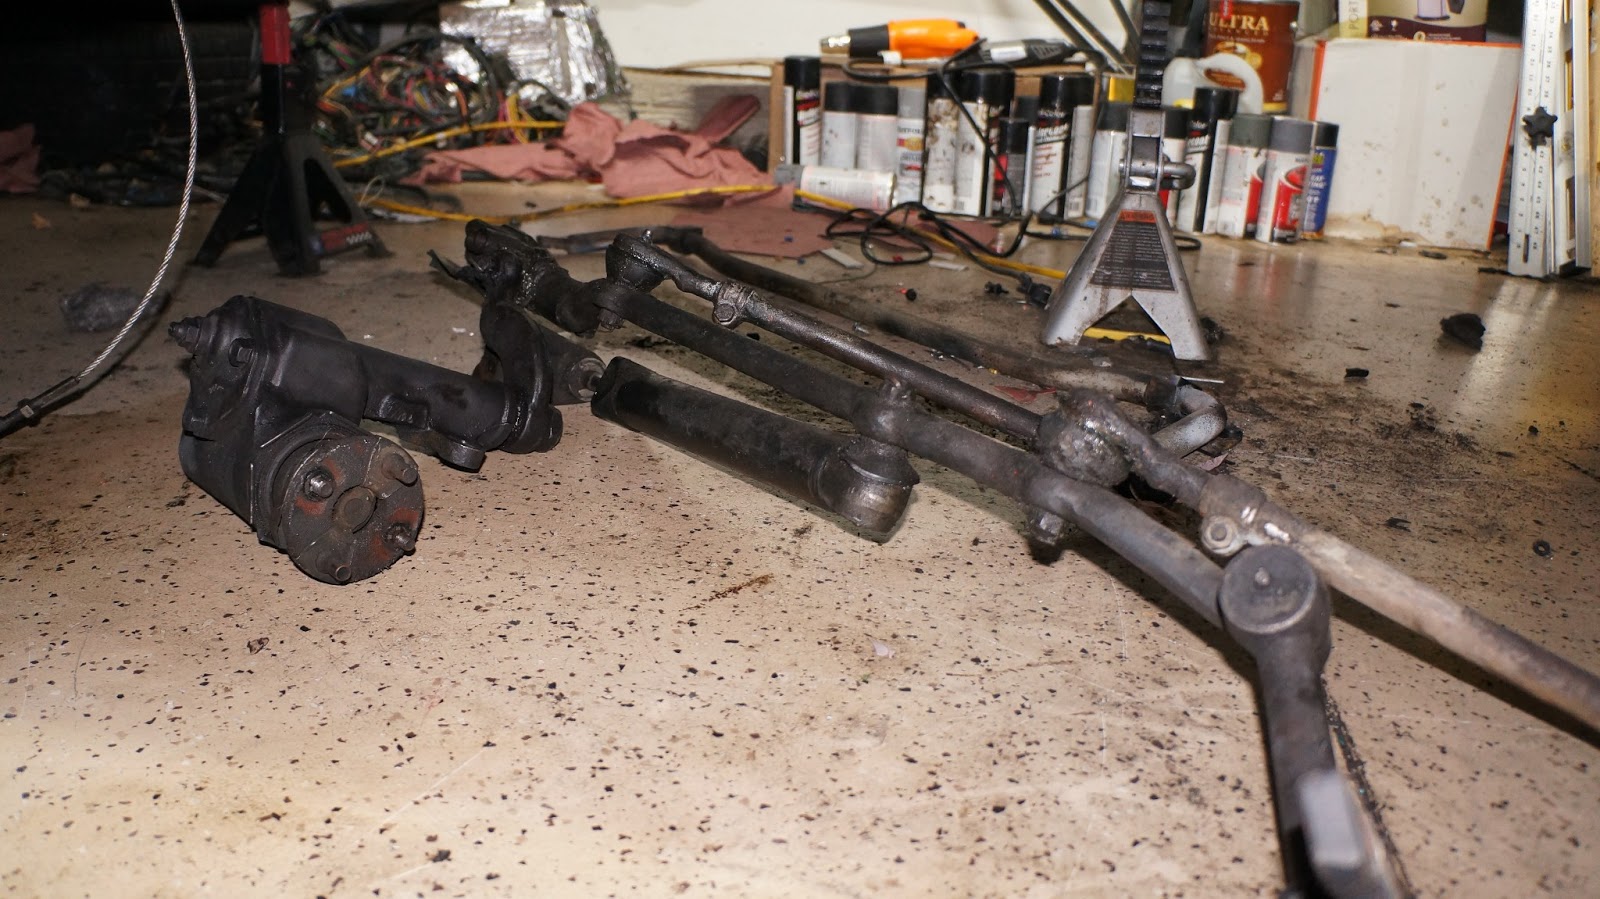
While I was installing the hydroboost, I was installing Steeroids in parallel. A quick overview of what that is... Essentially it's a system that replaces the entering steering system with a power rack-and-pinion system to provide much better handling. If you've ever driven one of these old Corvettes, you know they handle like a freaking pig! Anyway, step one was to remove the entire old system in one shot (had to got buy a pickle fork to release the tie ends). Then you install some custom made brackets into existing holes in the chassis. After those are installed, it's just a matter of bolting the rack-and-pinion system up to the new brackets. All pretty simple and straight forward at this point.
Next, you have to install this custom u-joint system that connects the steering column up to the rack-and-pinion. And now for trouble. I couldn't get the steering column spline into the joint. It was just a hair too large. I contacted the manufacturer (Speed Direct) and they said to take a file to each one of the grooves on the column and the joint until I can get it on. After 3.5 hours of filing and sanding, I was finally able to get the joint onto the steering column far enough. That was a huge pain, but tech department said I needed to get it all the way so the joints wouldn't bind up and length was right. I was so excited when I finally get it on and working that I had to take a video.


With the work that I'm doing on the steering and brake booster, I'm currently not able to put the exhaust manifolds back on yet. If those were in, this would take much longer or even be impossible to do. That hasn't stopped me from getting them ready to be put in. I now have my Thermo-Tec exhaust wrap on the headers and it had been sprayed with their high heat coating for protection and additional insulation. Once I done putting the hoses on these new systems, the exhaust is ready to go.


Oh and here's a couple pictures from a few weeks ago. This is the fuel line hooked up...


As I mentioned in my previous post, I've had about a week and a half to work on the car without work and school interfering (just had to do family holiday things). And now with a baby on the way, pressure is on to get this project done! (due July 9th)
First thing I did was get the wiring done, and it looks pretty good if I don't say so myself! I replaced a fuse box I had gotten with terminal panel because I needed just terminals to hook up to power on ignition, and the connectors for the box allowed it to touch the insulation which I didn't like. I coated the terminal panel with liquid electrical tape (did that to the stud in the engine compartment next to the upper relay as well) just to make sure a positive terminal wasn't exposed. The breaker on the right in the first picture is for the Vintage Air system, the two larger relays are for the electric fans, the smallest relay and the breaker on the left is for the water pump. The upper relay is for power on ignition. Rather than run directly off the ignition circuit, I put a relay in that's triggered by the ignition circuit.


With the wiring complete, I went on to more ambitious tasks... The Steeroids rack-and-pinion and the Hydroboost brake booster. I attempted to get the brake booster a few month ago and install it over a 4 day weekend, but they ended up not being able to ship it out fast enough. For those not familiar with it, the purpose of the hydroboost system is to replace a standard vacuum brake booster with one that runs off the power steering pump. There are several benefits to running such a system, but the main one for me is that I do not have to use the vacuum port on the intake manifold. If you're familiar with some of my previous issues, you know that my new air gap intake, Holley style carb, and stock hood make it impossible for me to use the port without using an absolutely tiny air filter (not what I want to do...).
To be honest the hydroboost went on really smooth. I had a slight issue that I had to drill out two of the mounting holes a little, but other than that, it was pretty easy. The booster has 4 bolts that are horrible to get to with all the wiring in place that I had just done, but with a really long ratchet extension and a swivel I was able to them off and back on with minimal swearing. I haven't hooked up the hoses yet because the Steeroids system will be hooked up as well. Oh, and check it out... I can actually get to the oil dipstick now!!


While I was installing the hydroboost, I was installing Steeroids in parallel. A quick overview of what that is... Essentially it's a system that replaces the entering steering system with a power rack-and-pinion system to provide much better handling. If you've ever driven one of these old Corvettes, you know they handle like a freaking pig! Anyway, step one was to remove the entire old system in one shot (had to got buy a pickle fork to release the tie ends). Then you install some custom made brackets into existing holes in the chassis. After those are installed, it's just a matter of bolting the rack-and-pinion system up to the new brackets. All pretty simple and straight forward at this point.
Next, you have to install this custom u-joint system that connects the steering column up to the rack-and-pinion. And now for trouble. I couldn't get the steering column spline into the joint. It was just a hair too large. I contacted the manufacturer (Speed Direct) and they said to take a file to each one of the grooves on the column and the joint until I can get it on. After 3.5 hours of filing and sanding, I was finally able to get the joint onto the steering column far enough. That was a huge pain, but tech department said I needed to get it all the way so the joints wouldn't bind up and length was right. I was so excited when I finally get it on and working that I had to take a video.


With the work that I'm doing on the steering and brake booster, I'm currently not able to put the exhaust manifolds back on yet. If those were in, this would take much longer or even be impossible to do. That hasn't stopped me from getting them ready to be put in. I now have my Thermo-Tec exhaust wrap on the headers and it had been sprayed with their high heat coating for protection and additional insulation. Once I done putting the hoses on these new systems, the exhaust is ready to go.


I have done a few other things... I've sized the Lokar transmission cooler dipstick to the correct length to indicate full and I've also started configuring the shifter (that one's kinda tricky). I also started connecting up the transmission cooler lines to the radiator. Fortunately, the connections were really easy (contrary to what I originally though). Now it's just a matter of connecting up the hard line to the flex lines and filling the transmission with fluid. BTO makes you do some pressure and temperature tests on the transmission once it's installed to ensure it was done correctly. Both the sensors are now installed, but I have no idea how I'm going to get them into the cabin with the side pipes...


Oh and here's a couple pictures from a few weeks ago. This is the fuel line hooked up...


Subscribe to:
Posts (Atom)